
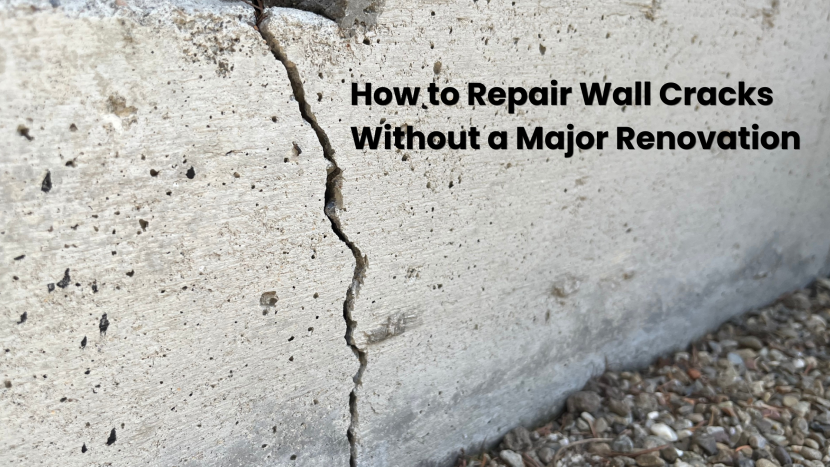
How to Repair Wall Cracks Without a Major Renovation
Wall cracks are one of the most common complaints we hear from homeowners across Lahore, whether it’s a freshly built house in Bahria Town or a decade-old property in Johar Town. The good news: most wall cracks can be repaired properly without tearing down plaster, rebuilding walls, or calling in a full renovation crew. What matters is correctly identifying the type of crack first, because the fix depends entirely on that.
Not All Wall Cracks Are Equal
Before you buy a tube of filler and start patching, take five minutes to actually read the crack. The wrong repair on the wrong crack will fail within a season.
- Hairline cracks (less than 0.2mm wide): Usually just plaster shrinkage or paint age. Common in new construction, most grey structures develop these within the first year as concrete cures and dries out. Low concern.
- Diagonal cracks at window and door corners: Often caused by lintel deflection or minor differential settlement. Monitor for 4–6 weeks. If they stop growing, they’re stable and can be filled. If they keep widening, you need a structural assessment.
- Horizontal cracks running along the wall: These can indicate lateral pressure, especially on boundary or basement walls. Don’t patch and ignore. Get a structural engineer to look at it.
- Vertical cracks running floor to ceiling: Could be thermal movement or, in worse cases, foundation settlement. Width and location matter here. A crack at a construction joint (where two pours met) is usually benign; a crack through solid masonry is a flag.
- Staircase or stepped cracks through brick joints: Almost always differential settlement. If it’s old and stable, repair is straightforward. If it’s fresh or actively growing, stop and call someone.
Rule of thumb: Any crack wider than 3mm, running through structural members (columns, beams, slabs), or actively growing week over week needs professional evaluation before you touch it.
Tools and Materials You’ll Need
For most non-structural crack repairs on interior or exterior plaster walls, a local hardware shop (patti ki dukan) in Lahore will have everything you need. Here’s a working list:
| Item | Purpose | Approx. Cost (PKR) |
|---|---|---|
| Crack filler / ready-mix putty (e.g., JK Wall Putty, Berger) | Filling hairline and minor cracks | 800–1,500 / kg |
| White cement (Lucky or Maple Leaf) | Base filler for deeper cracks in plaster | 400–600 / kg |
| Bonding agent (Febond, SBR latex) | Improves adhesion of new plaster to old surface | 1,200–2,000 / litre |
| Fibre mesh tape (alkali-resistant) | Reinforcing repaired area to prevent re-cracking | 300–600 / roll |
| Chisel and hammer | Opening crack for proper filling (raking out) | Already have / 200–500 |
| Putty knife / trowel | Application and smoothing | 150–400 |
| Sandpaper (80 and 120 grit) | Final finishing before paint | 50–100 / sheet |
Rates vary by supplier and area — confirm current prices before purchasing. These figures are approximate as of mid-2026.
Step-by-Step: How to Repair Wall Cracks Properly
This process works for hairline to medium cracks (up to about 5–6mm wide) in plaster or brick walls. For anything deeper or structural, stop at step one and get professional advice.
- Rake out the crack. Use a chisel and hammer to widen and deepen the crack slightly into a V-shape or undercutting profile. It sounds counterintuitive, but a raked-out crack gives the filler something to grip. Remove all loose plaster, dust, and debris. Don’t skip this — a crack filled without raking will pop out within months.
- Clean the area. Brush out all dust with a dry brush. For exterior walls or damp areas, also check for efflorescence (white salt deposits) — scrape these off completely before proceeding.
- Apply bonding agent. Dilute SBR latex or Febond (typically 1:3 with water for the first coat) and brush it into the raked crack and surrounding plaster. Let it become tacky — don’t let it dry completely.
- Fill in layers. For cracks deeper than 5mm, don’t fill in one go. Use a mix of OPC cement and sand (1:3) with a little bonding agent for the base layer, pressing firmly into the crack. Let it cure 24 hours. Then apply a finishing coat of white cement putty or ready-mix filler, feathering it out 50–75mm on either side of the crack.
- Apply fibre mesh tape. For any crack that was more than a hairline, embed alkali-resistant mesh tape into the still-wet finishing layer. Press it flat with your trowel and apply a thin skim coat over it. This step is what separates a repair that lasts from one that re-cracks at the same spot within a year.
- Sand smooth. Once fully cured (minimum 24–48 hours), sand the repaired area flush with the surrounding wall using 80 grit, then finish with 120 grit.
- Prime before painting. A dedicated wall primer seals the repair and ensures the paint colour matches. Painting directly over a patch without primer almost always leaves a visible spot — the patched area will look different once dry.
Exterior Wall Cracks: Additional Considerations
Exterior cracks in Lahore get exposed to summer heat (often above 42°C), monsoon rain, and damp winters. Standard interior fillers don’t hold up outside. For external wall crack repair, use:
- A waterproofing-grade crack filler or elastomeric sealant (brands like Dr. Fixit Crack-X or Fosroc Renderoc are available locally)
- OPC cement-based repair mortars rather than gypsum-based products — gypsum dissolves in moisture
- A waterproof finish coat or exterior-grade paint after repair
If your exterior plaster is showing widespread cracking — not just isolated lines — it’s worth examining the original plaster mix and thickness. Thin plaster over poor bonding will continue to fail piecemeal. In that situation, a partial re-plaster of the affected face is more cost-effective long term than patching crack by crack.
On the topic of waterproofing and damp-proofing in construction, understanding your DPC (damp proof course) at plinth level is equally important. A failed DPC is often the root cause of rising damp and wall deterioration in older Lahore properties. You can learn more about how we approach waterproofing and structure in our construction consultation process.
When to Call a Professional Instead
DIY repair is perfectly fine for stable, surface-level cracks. But call a structural engineer or an experienced contractor if you see any of the following:
- Cracks wider than 5–6mm or growing visibly over days or weeks
- Cracks accompanied by doors or windows that suddenly stick or won’t close properly — a sign of structural movement
- Horizontal cracks in boundary or retaining walls
- Cracks running through or out of columns, beams, or the underside of a slab
- Any crack on a property that has recently had heavy construction nearby, especially if piling or deep excavation was involved
- Multiple cracks appearing simultaneously in different parts of the house
Settlement-related cracking in Lahore is not uncommon, particularly in areas with high water table fluctuations or where plot filling was done poorly before construction. If your property sits on filled land — which is the case in many newer housing schemes on the outskirts — this context matters when diagnosing cracks.
Rough Cost to Repair Wall Cracks in Lahore
If you’re hiring labour rather than doing it yourself, here’s a realistic picture. A skilled plaster repair worker (mistri) in Lahore typically charges by the day or by the running foot of crack.
| Repair Scope | Approx. Labour Cost (PKR) | Notes |
|---|---|---|
| Hairline crack filling (per room) | 3,000–8,000 | Materials extra |
| Medium crack repair with mesh (per running foot) | 150–300 | Varies with depth and access |
| Partial re-plaster (per sq ft) | 80–150 | Includes finishing, not paint |
| Full mistri day rate (crack + touch-up work) | 2,500–4,500 / day | Lahore market rate, mid-2026 |
These are indicative ranges. Labour rates in Lahore move with inflation and season — always get 2–3 quotes before confirming work.
If your home needs broader repair work beyond just cracks — including leaking roofs, spalling plaster, or finishing updates — it’s often more cost-efficient to bundle it into a single repair scope. Our team at IHS regularly helps clients in Lahore put together a proper repair and renovation BOQ so you know exactly what you’re paying for before work begins.
Preventing Wall Cracks in New Construction
If you’re building now, a few things your contractor should be doing to minimise future cracking:
- Cure concrete properly — minimum 7 days of wet curing on slabs and columns, 21 days for full strength. Rushed curing in Lahore summers is a leading cause of premature cracking.
- Don’t plaster too soon. New RCC and brick walls need time to dry out before plastering. Plastering green brickwork is a frequent cause of cracking and hollow spots.
- Use correct plaster mix ratios — 1:4 (cement:sand) for base coat, 1:6 for finish coat. Richer mixes shrink more and crack more.
- Ensure chicken mesh or expanded metal lath is fixed at junctions between concrete and masonry — this is where differential movement causes cracks most predictably.
- Confirm your DPC is properly laid at plinth level to prevent rising damp from weakening plaster from below.
For a detailed overview of what good construction supervision looks like at each stage, see our guide on construction quality checks for Pakistani homeowners.
Frequently Asked Questions
Can I use simple wall putty to fill all types of wall cracks?
Wall putty works for hairline surface cracks in plaster, but it’s not suitable for deeper or structural cracks. Putty has no tensile strength — it will crack again in the same place if there’s any movement. For cracks deeper than 2–3mm, use a cement-based filler with mesh reinforcement as described above.
My wall crack keeps coming back in the same spot, what’s going wrong?
Recurring cracks at the same location usually mean one of two things: either the root cause (movement, settlement, thermal expansion)